Distant Screws II Challenge Coin
From Rabbi Blog
About
- Evelyn's Story
- JelloWiggler's Frontier Forums Thread
- Expedition Page on EDSM
- Evelyn's Light Position on EDSM
ReadMe
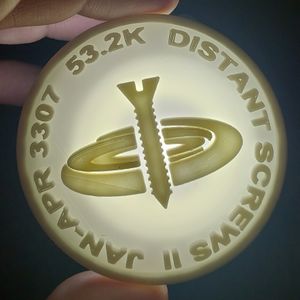
A how-to for printing the 3D LS DS II Challenge Coin for anyone that was on the 2021 Distant Screws II Expedition.
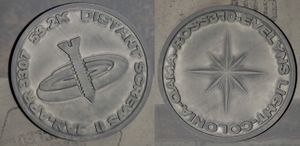
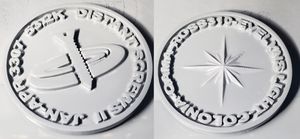
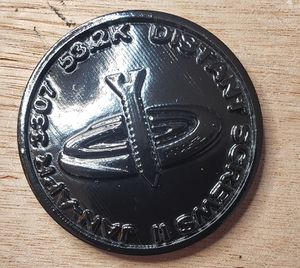
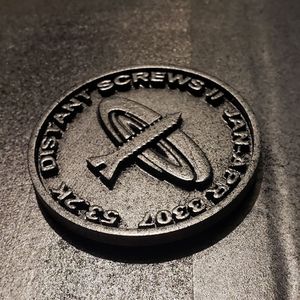
The front-side features the classic LS Logo, the expedition name, dates and the waypoint distances traveled.
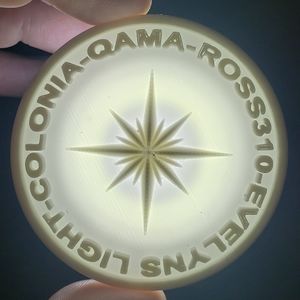
The backside features the four points of the journey (ROSS310-EVELYNS LIGHT-COLONIA-QAMA) and a star to honor Evelyn Faye Roy.
Printing Suggestions
    Scale to 60mm x 60mm x 8mm (or 10mm)
    Super Quality
- With trees: On an edge - will require sanding and clean up.
- In halves:
- Duplicate the STL on the bed
- Sink both below the bed to 1/2 the Z width (-4mm or -5mm)
- Flip one of the faces
- Sand edge as needed with 220g and 500+
- Prime
- Paint Black Gloss
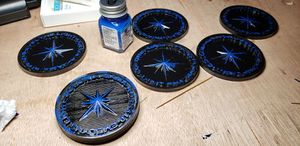
- Paint Blue acrylic
- Dust paint Silver metallic
- Glue together
Created by RabbiBob 3/1/2021 w/ Blender 2.9.x
Download
- Download: Zip file 4.5MB
Directions
- Below are my steps for creating the coins. YMMV.
3D Printing
Sanding
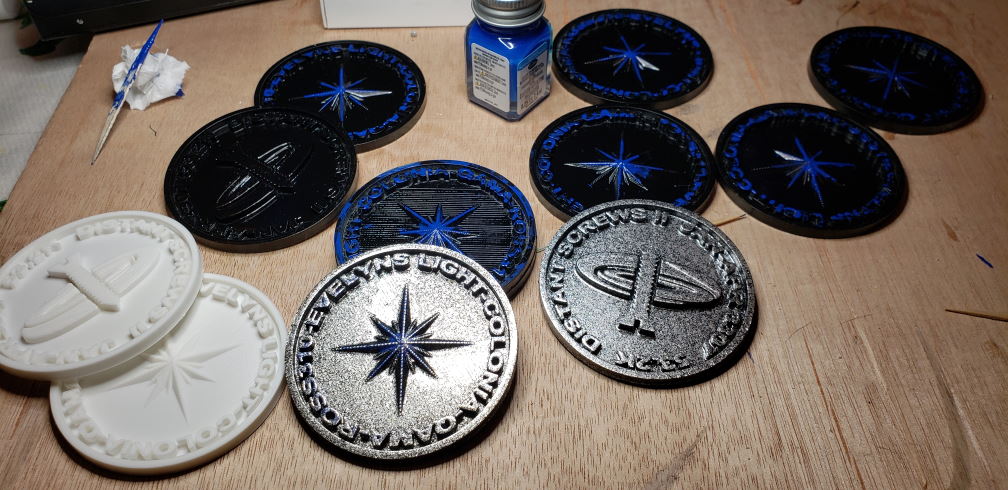
- Lightly sand the edges and any surface you can without damaging the raised items. You can see in some of the final coins the ones where a combination of sanding and primer worked well and others that didn't during testing.
Painting
- Someday I'll buy an airbrush kit. Until then, fun with aerosol cans!
- Requirements:
- Krylon Sandable Primer
- Gloss Black spray paint
- Blue acrylic paint
- Metallic Silver spray paint
- Mod Podge® Clear Acrylic Sealer, Matte
- Modelling glue
- Something to fit under the coin to keep if off the resting surface (washer, nut, etc)
Primer
- Do two separate coats of prime where the first coat is close to a dusting.
- Second coat should fill in a lot of the printer lines
Black Coat
- Apply a single shiny black coat
Blue Highlights
- Lightly apply blue acrylic paint to various raised areas. I used a toothpick to do the coins. There are one or two green coins in the bunch, however blue seemed to be the best choice.
Silver Dusting
- Lightly apply a dusting of silver. The goal is to try and let some of the gloss black poke through. Your call on the final outcome. In my batch, the 13 coins ran a range between almost full silver vs a moderate dusting.
Glue
- Glue the halves together
- Only four or five dabs of model glue is needed. Don't let it ooze from the middle onto the edges of the coin.
Seal
- Seal the coin with Mod Podge Clear Acrylic Sealer
- This helps not only protect the coin but also to seal in some of the paint smell
Visting
